01 December 2016
How to Embed Codepen Projects in Blogger?
Codepen.io is the most amazing online editor and front end development playground for HTML, CSS and JavaScript. It's not just an online editor, Codepen has an amazing community and it is really a great place to show off your creativity, get feedback and find inspirations for future projects.
Now, suppose you have a blog at blogger.com and you want to add your Codepen projects into your blog posts, so that the readers don't have to reopen a new link to view your code and its output. In this post we will see how to embed Codepen in Blogger blog posts.
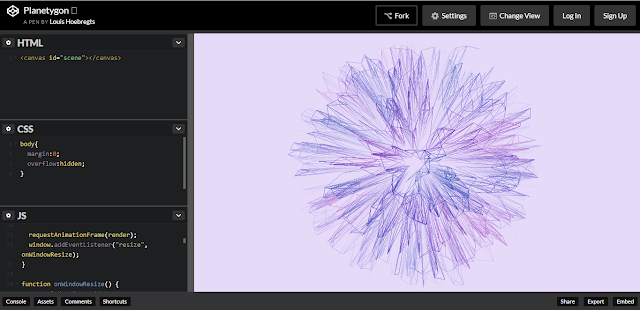
Actually it is very easy. I have embedded one Codepen project below. This beautiful project is called "Planetygon" and created by Louis Hoebregts in Codepen.io
(Here the left panel shows the codes and the right panel shows the result.)
You can easily embed projects like this or your own inside your Blogger blog post.
Here is a step by step guide on how to embed your Codepen.io creations in Blogger:
1. If you see a project in Codepen.io that you like. you can embed that project in your blog post without opening a Codepen account.
But if you want to embed your own project, then you must have a Codepen account. Because before you embed a project into somewhere else, you must save your work in Codepen.
Opening an account is easy and free. As you are reading this post, you may already have a Codepen account.
2. Open the project in Codepen.io. (Again, if its your own project, you must save the project first.) You will see something like this:
At the lower right corner, there are three buttons: Share, Export and Embed. (Click on the image above for a larger view.)
3. Click on the Embed button in your Codepen.io project page. A new pop-up titled "Embed This Pen" will open. Now, if you scroll down, you will see a "Copy and Paste Code" section. There are three ways to embed code. You will see three tabs. One for Wordpress, one called iFrame and another HTML.
But you don't see anything specific for Blogger, right? Actually both the codes in iframe and HTML tab will work for Blogger. However, I have had some problems with the HTML version of the code (even though it is marked as recommended).
So, I would suggest that you click on the iframe tab and copy the code form there.
4. Next, open the blogger post withing which you want to add the Codepen project codes and go to edit mode. In the Blogger's edit mode, you will see there are two editing options: Compose and HTML.
By default, we edit our blog posts in Compose mode. But now, click the HTML mode and paste the iframe code you copied from Codepen in step 3.
5. Click back to Compose mode and you will see the Codepen project has been embaded in your Blogger post! Now, you can add blog texts above and below the Codepen iframe.
So, we are done. It's time to share your Codepen projects in Blogger!
Note:
If you have a Codepen pro account, you can even make the embedded Codepen codes editable!
I hope you have found this post helpful. Let me know if something is not working and share your thoughts below.
Subscribe to:
Post Comments (Atom)


How can I add this effect to my blogspot banner ? Please, help....
ReplyDeleteTIA.
this is the effect I want to add.. https://codepen.io/Ravyre/pen/gXawyY
ReplyDelete