21 December 2016

Lecture 13: Element, Class and ID Selectors


A CSS rule is written like this:

selector {
   statement;
}

The selector decides on which HTML elements the CSS rule will be applied to. (Remember that we can have more than one statement in a CSS rule.)

There are three main types of selectors:
  1. Element selector
  2. Class selector
  3. ID selector
An element selector directly mentions the HTML element name on which the CSS rule is to be applied. 

Here is an example: (You need to click on the CSS tab to see the CSS code.)


The CSS rule has an element selector - h3. So the rule is applied to all (here two) h3 elements of the HTML. The text-align: center; statement causes the h3 elements to be centrally aligned. 


Next, suppose we have three h3 elements in a page but we only want to centrally align the first and the last one. In these cases we can use the class selector.

Here is an example:


You can see that the heading Paragraph 2 is not centrally aligned. Notice the HTML. We have added class attributes to the first and last h3 opening tags. We have named them
center. Actually we could have given any class name to them.

In the CSS we have used .center (notice the dot) as our selector. Now all HTML elements of the class center will have that CSS rule applied to them. Again, it doesn't matter what class name we give, we could have given the first and last h3s a class name xyz. And then .xyz CSS selector will centrally align them.

So, we use class selectors to select multiple HTML elements from a group of elements. 

The ID selector is used to select one particular HTML element. Though several HTML elements can have same class, one ID can't be used more than once.


In the example above, we have used both the ID and class selectors. Note that while creating CSS rule for ID, we use # before the ID name.

NOTE: There should be no gap between the dot . or hash # and the class or ID name.

An HTML element can have both a class and an ID. Note the CSS of this example carefully:


We can apply a CSS rule to multiple elements (i.e. selectors) by using commas. Example:

p, h1 {
   color: blue;
   text-align: center;
}

The above CSS rule will be applied to every p and h1 elements.

Another example:

div, .real {
   color: green;
   font-size: 30px;
}

This CSS rule will be applied to every div element and to every element of real class.

Lecture 12: Anatomy of a CSS Rule


Here is an example CSS rule. (Click on the CSS button to see the CSS code.)


CSS associates rules to HTML elements. What above CSS rule does is it changes the font color of the HTML paragraph to blue. 

Here is the CSS code again:

p {
   color: blue;
}

The p is called the selector. When we apply the above CSS to an HTML, it will be applied to all HTML p elements.

color: blue; is called the CSS declaration. A CSS deceleration has a property (here color) and a value (here blue). There are predefined properties and values that can be applied to an element. 

In our next example there are three HTML paragraphs and one CSS rule that turns all the paragraphs to green.


By the way, a CSS rule can have several declarations, as shown below:  


A collection of CSS rules is called a style sheet. Here is an example:


By the way, the width deceleration specifies the width of the element (here paragraph). So you can see the paragraphs' width is restricted to 100px. 


Note that though the h1 has no font-size deceleration, it is still shown in a larger font. This is because for h1 to h6 tags, the browser itself adds some style by default. 
   

Lecture 11: Power of CSS


CSS stands for Cascading Style Sheet.

HTML provides the content of a web page. CSS provides the style. CSS can style the content of a webpage in a diverse way.

We shall use codepen.io to show example codes in these blog posts. In Codepen we type the HTML and CSS in two different panels. Here is one example:


You can see there are three buttons in the code frame:
HTML, CSS and Result. Click on the CSS button to see the CSS code. Clicking on the Edit on Codepen button on the top right corner will take you to the Codepen project page where you can directly edit the code.  

19 December 2016

Lecture Notes: HTML, CSS, and Javascript for Web Developers (Coursera)


coursera logo


This post contains links to all lecture notes for the Coursera course "HTML, CSS and JavaScript for Web Developers" from John Hopkins University. 

Week 1: Introduction to HTML 5

HTML Basics

Lecture 1: What is HTML?
Lecture 2: 
Relevant History of HTML

Lecture 3: Anatomy of an HTML Tag
Lecture 4: Basic HTML Document Structure
Lecture 5: HTML Content Models

Essential HTML 5 Tags

Lecture 6: Heading Elements (and some new HTML 5 semantic comments) 
Lecture 7: Lists
Lecture 8: HTML Character Entity References 
Lecture 9: Creating Links
Lecture 10: Displaying Images

More lecture notes are coming soon.
IMPORTANT : These lecture notes are personally created following the course lecture videos. These are not official lecture notes from Coursera. 

Course link: https://www.coursera.org/learn/html-css-javascript-for-web-developers/ 

Lecture 10: Displaying Images


Here is how we add an image in an webpage:


As you can see the tag we used is the img tag. The main attribute is the src attribute which contains the link of the image. The link can be relative or absolute. 

The width and height attributes are optional, but useful because they help the browser know in advance what screen space should it allocate to the image. The alt tag is also optional. But should be included as it helps the screen readers and also this text will get displayed if the browser can't display the image (in case of a broken link).

The img is an inline element.

Lastly, we shall talk about the HTML comment. A comment will get ignored by the browser. We start the comment with <!-- and end with -->


Lecture 9: Creating Links


We can say that there can be two types of links in a webpage.
  1. Internal links
  2. External links
Clicking an internal link will open a new page that belongs to the main website.  
Clicking an external link will open a new page that belongs to a different website.

We have been using Codepen to show most of our code examples so far. But for the example of internal link, let's assume you have a folder in your computer. In that folder you have two HTML documents. One is called index.html and the other is document.html. 

Suppose document.html has some contents (whose details we don't need to worry about) and what you want is to create an internal link to document.html from index.html. 

And here is the index.html page code to do that:

<!DOCTYPE html>
<html>
    <head>
        <meta charset="utf-8">
        <title>Page title</title>
    </head>
    <body>
        <a href="document.html">Click to open Document</a>
    </body>
</html>

This is the code for our index.html file. The <a> --- </a> tag (called anchor tag) is the tag that creates link. When you open the index.html file in your browser you will see a link "Click to open document." Clicking on the text "Click to open Document" will take you to the document.html page.

The href="---" is an attribute of the <a> tag. The value of this attribute should be a link. Now, in the case of internal link, we can just mention the file name (instead of an URL) because we are assuming that we already have that file in the same folder in our local machine (or server). Links like this are also known as relative URLs.

Next, here is an example of an external link:


In case of external links, the value of href attribute must begin with http:// or https://
Links like these are known as absolute URLs.

Also, we have two additional attributes, the target="_blank" and the title=" --- "

The title=" --- " should be included in every link (internal or external). We haven't included that in our example for internal link. But we should've. What the title tag does is it describes what the link is about. This description will not be displayed in the page but can be read by screen readers and thus will help visually impaired people navigate.

The target="_blank" attribute is common for external links. When you add this attribute to any link, clicking on the link will open the linked page in a new window. 

Generally <a> behaves as an inline element. Meaning, a link element will not automatically start in a new line. To have the link displayed in a new line we can do this:

<a href="---" title="---">
   <div>Clickable text.</div>
</a>

Now this link will start in a new line. But you may wonder, if <a> is an inline element then how can it contain <div>, which is a block level element? 

Well, actually in HTML 5, the <a> is both a Flow content (which is equivalent to inline element) and a Parsing content (which is equivalent to block level element).  

Next we will discuss about Fragment identifier. 

Suppose you have a section inside your page as below -

<section id="section1">
   -----
</section>

Here, the id attribute has given the section a name.

Now, suppose you want to create a link within the same page as below -

<a href="#section1">Go to section 1</a>

Clicking on this link will take you to the section1 part of the example page. Many sites use this as Go to top button.

18 December 2016

Lecture 8: HTML Character Entity References


As HTML itself uses the > , < and & signs in its code, to put these symbols in your content you should use &lt; , &gt; and &amp; respectively. 

Also, it is safer to use &quot; for quotations as some browsers or might use a limited encoding rather than the utf-8. 

There are also many other character entity references in HTML. An useful one is the copyright symbol &copy; .

Example is given below:


Another useful entity is the &nbsp;

Generally when we resize the browser window, the webpage text gets warped. But if you use &nbsp; between the words (with no space) those words will always remain together. 

For example: If you write - 
My&nbsp;is&npsp;John&nbsp;Doe
- then the text "My name is John Doe" will always stick together (i.e. the text won't break at midpoint and will always remain in the same line even if the browser is resized).

As you know, in an HTML code, if you put multiple spaces between words, the browser still counts only one space. Some people used &nbsp; multiple times to force the browser to display multiple spaces. But that is really a bad practice and &npsp; should not be used for that purpose. There are other ways to put multiple spaces between words, which we will learn later.

Lecture 7: Lists


There are basically two types of lists in HTML: Ordered and Un-ordered.

Here is an example of an un-ordered list:


Each list item should be in <li> --- </li> tags and the whole list should be inside an <ul> --- </ul> tag. 

Remember that nothing except the li elements are allowed inside the <ul> --- </ul>. So the list title is not inside the ul tag. (The div tag is used just to keep the list with its title separate from other possible contents. It is not really necessary.)

Next, here is an example of an ordered list:


The ordered list is usually used when the list contains something that should be in an specific order. 

There can also be nested lists. 

Lecture 6: Heading Elements (and some new HTML 5 semantic comments)


We have six heading tags in HTML. h1 to h6.


All heading elements are block elements. So in a sense they are similar to <div>. But the browsers usually apply some style to the headings. That's why the h1 element is displayed in larger fonts. 

However, we should not use the heading tags to solely style our page. These tags have some semantic meanings too. For example: The h1 should contain the most important idea of a document and so on for h2 to h6. This is good for SEO. 

Again, (apart form the large fonts) the heading tags are actually different from regular divs because h1 to h6 are semantic tags. A semantic HTML element implies some meaning to the content. 

HTML 5 introduced many semantic tags that can help both the human readers and browsers realize the semantic meanings of a document. 

Here is an example HTML document that uses semantic tags to structure its content:

<!DOCTYPE html>
<html>
    <head>
        <meta charset="utf-8">
        <title>Heading Elements</title>
    </head>
    <body>
        <header>
            Company logo, some tag line, etc.
            <nav>Contains links to parts of the web site.</nav>
        </header>
        <h1>Main Heading of the Page.</h1>
        <section>
            Section 1
            <article>Article 1</article>
            <article>Article 2</article>
            <article>Article 3</article>
        </section>
        <section>
            Section 2
            <article>Article 4</article>
            <article>Article 5</article>
            <article>Article 6</article>
            <div>A regular div element</div>
        </section>
        <aside>
            Information related to the main topic (related posts).
        </aside>
        <footer>
            Copyright info etc. 
        </footer>
    </body>
</html>

All of the tags used inside the <body> --- </body> of this document are block elements and can be replaced by div tags. But that will no longer give the document any semantic meaning.

Lecture 5: HTML Content Models


Before HTML 5 there were only two types of HTML elements:
  1. Block level elements
  2. Inline elements
In HTML 5 the elements are divided into 7 types. But the concept of block level and inline elements are still useful. 

A block level element always begins in a new line and also pushes any next inline element to a new line. 

An inline element begins at the same line. 

To illustrate this, we introduce the div and the span element. <div> is an example of a block level element and <span> is an example of an inline element.


Here we can see that the first line is a div text. And hence it pushed the next span text to a new line. The third line (in the code) is a span text. So it begins at the same line of the previous span text (in the output). The next div begins at a new line.


A block level element may contain both block level and inline elements. But an inline element can only contain other inline elements. 

For example - 
<div>This is some <span>text</span> only.<div> is valid HTML. 
<div>This is some <div>text<div> only.</div> is also valid. 
<span>This is some <div>text</div> only.</span> is invalid
<span>This is some<span>text</span>only.<span> is valid. 

In HTML 5 the element classification is more complex. 

Under the new category system (which you can check at https://www.w3.org/TR/html5/dom.html#kinds-of-content) the block level elements can roughly be called Flow content and the inline elements can roughly be called Phrasing content. 

For most of the practical purposes, the concepts of block level elements and inline elements are enough.
  

17 December 2016

Lecture 4: Basic HTML Document Structure


The basic HTML document structure is as follows:

<!DOCTYPE html>
<html>
    <head>
        <meta charset="utf-8">
        <title>Page title</title>
    </head>
    <body>
        <p>Hello world.</p>
    </body>
</html>

The code above is as same as the Codepen code below:


In Codepen you should only type the part that you want to be inside the <body> --- </body>  part. The <body> --- </body> tag contains the main page content.  

But if you use an text editor to create your .html file, you must use the basic template shown at the beginning.


The <!DOCTYPE html> declares that the page is an HTML 5 document.

The <html> --- </html> tag contains two parts:
The 
<head> --- </head> and the <body> --- </body>

The <head> --- </head> contains what is called the meta data. This part is not displayed in the web page but it contains important information for the browser. 

For example, the <meta charset="utf-8"> line tells the browser which encoding is to be used to render the page. And the <title> --- </title> contains the page title, which gets displayed as the tab name when you open the page in a browser. 

As mentioned before, you don't need to include the <title> --- </title> in Codepen. But it must be included in any HTML document that you type in a text editor. 

You should have noticed by now that one HTML tag may contain other tags inside it and so on. But the tags must be properly nested. For example, the following code is invalid:

<div>This is some text.<p>We have p tag.</div>And div tag.</p>

The code is invalid because we have opened a div tag and then a p tag. But while closing them we have closed the div tag before the p tag. (We will discuss more about the div tag later.)

The correct way to write the above code can be as below:

<div>This is some text.<p>We have p tag.</p>And div tag.</div> 

Lecture 3: Anatomy of an HTML Tag


In this lecture we will introduce three HTML tags: 

br
hr

p stands for paragraph. 
br stands for line break.
hr stands for horizontal rule.

The p tag is used to put texts in a paragraph. 

Here is an example: 

<p>Hello world.</p>

So what does this HTML code do? Well, it just creates a paragraph containing the text "Hello world."

There is a wonderful online HTML (also CSS and JavaScript) editor called codepen.io, which we will use to show what our HTML code does in action. 


The left panel shows the code and the right panel shows the output. You can also experiment with the code by clicking Edit On Codepen at the upper right corner.

Next, we will show another HTML code with two paragraphs. 


Note that in the output, the next paragraph begins in a new line.

Anyway, you can see that each paragraph has an opening tag <p> and an closing tag </p>
The content (which is text for paragraph) goes in between the opening and closing tag.

p is called the paragraph element. Most of the HTML elements have an opening and a closing tag. But some elements do not have any closing tags. 

For example: The br element (which stands for line break) has no closing tag.


It should be clear form above what the br tag does. 

Another element that has no closing tag is the hr element. The hr element puts a horizontal black line in the page. 


By the way, there is an interesting thing about the above code. Note that in the code there is no blank line between the two paragraphs. But the output still starts the second paragraph in a new line. 


The browser actually doesn't see the blank spaces or lines like we do. The p tag tells the browser to put the text in a new paragraph. And the new paragraph starts in a new line by default. 

Though we know that the white spaces will be ignored in most of the cases, we should always try to format our code for better readability.

However, there are two specific cases where spaces are not allowed (in the HTML code):   

  1. In the opening tag, there can be no space after the opening angle bracket.
    That means <  p> is not allowed. 
  2. In the closing tag, there can be no space after the opening angle bracket.
    That means <  /p> is not allowed.
In every other place in an HTML code, spaces are allowed and will (almost always) be ignored.

The last thing that we are going to discuss in this lecture is tag attributes. 

An HTML tag may have attributes. Each type of tag has a possible set of attributes. When we write a tag in our code, we can give one or more of those possible attributes to it. Each attribute has a possible set of values.

An example will clarify it more. The p element or p tag can have an attribute called id. There are many other attributes that p can have. But let's use id as our example. The id attribute can have any text (including numbers) as its possible value.

So we can write - 

<p id="myID">This is a paragraph.</p>

Now this paragraph has an id attribute and the value of that attribute is myID. 

We will know more about attributes in the later lectures. 

For now, it should be remembered that id attribute is used to specify a certain element in the HTML code. For example: Suppose you have three paragraphs in your HTML code. You can give the three paragraphs id attributes with three different id names. 

<p id="para1">This is a paragraph.</p> 
<p id="para2">This is another paragraph.</p>
<p id="para3">This is yet another paragraph.</p>  

Once you give an id to an HTML element, you can never give that same id to another HTML element in the same document; even if that element is a different type of element. In other words, you can give one id name only once in an HTML document. 

We will learn about the use of giving ids to HTML elements, when we discuss CSS in the later lectures. In general, an HTML element is not required to have an id attribute or any other attributes.

Notice that there should always be space between the <p and id="---". That means writing <pid="---"> is not allowed. There must be at least one space between the tag element and its attribute name. But it doesn't matter if you write <p id="para1"> or <p id = "para1">. Both are correct.   

Another thing to notice is that we are putting the attribute values in double quotes. That is not really necessary and all of the following three lines are valid:  

<p id="para1">This is a paragraph.</p> 
<p id='para2'>This is another paragraph.</p>
<p id=para3>This is yet another paragraph.</p> 

However it is recommended that the attribute value is put in double quotes (like in line 1).

In case you are wondering how I included the Codepen code examples in my Blogger blog post, read this article: 
http://codetheweb.blogspot.com/2016/12/how-to-embed-codepen-projects-in-blogger.html   

16 December 2016

Lecture 2: Relevant History of HTML


Before 1997, browsers did not follow any proper HTML standard. So all sites could not be displayed properly by all browsers. In 1997, the World Wide Web Consortium (W3C) released the HTML 4 standard.  

Currently there are two groups who are involved with the HTML standardization process: W3C and WHATWG. WHATWG was created by browser companies and in recent years (since about 2007) W3C and WHATWG have started to work together. 

The present standard for HTML is known as HTML 5 (released in 2014).

The official W3C documentation regarding the HTML 5 standard can be found here: 
https://www.w3.org/TR/html5/

W3C also has a HTML validator that can check if an URL, html file or copy-pasted HTML code follows the HTML standard.
https://validator.w3.org/ 

Another very useful site is http://caniuse.com/. This site will allow you to check which HTML, CSS or JavaScript features are supported by which browsers.

Lastly, you can see the current browsers' usage shares from the link below:
http://www.w3schools.com/browsers/default.asp

Lecture 1: What is HTML?


The three basic web technologies are:
  1. HTML (structure)
  2. CSS (style)
  3. JavaScript (behaviour)
HTML stands for HyperText Markup Language

HTML annotates document and thus defines the document structure (like what is the heading, which text goes into a paragraph etc.)  

01 December 2016

How to Embed Codepen Projects in Blogger?


Codepen.io is the most amazing online editor and front end development playground for HTML, CSS and JavaScript. It's not just an online editor, Codepen has an amazing community and it is really a great place to show off your creativity, get feedback and find inspirations for future projects. 

Now, suppose you have a blog at blogger.com and you want to add your Codepen projects into your blog posts, so that the readers don't have to reopen a new link to view your code and its output. In this post we will see how to embed Codepen in Blogger blog posts. 

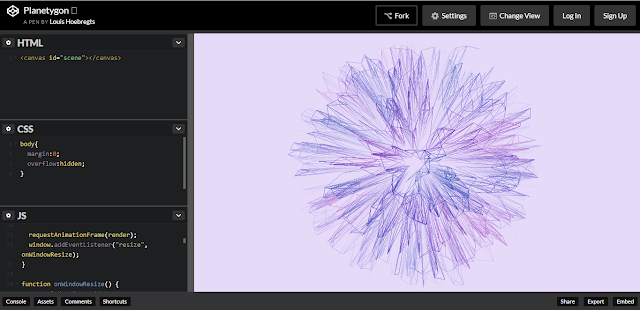
Actually it is very easy. I have embedded one Codepen project below. This beautiful project is called "Planetygon" and created by Louis Hoebregts in Codepen.io 
(Here the left panel shows the codes and the right panel shows the result.)


You can easily embed projects like this or your own inside your Blogger blog post. 


Here is a step by step guide on how to embed your Codepen.io creations in Blogger:

1. If you see a project in Codepen.io that you like. you can embed that project in your blog post without opening a Codepen account. 
But if you want to embed your own project, then you must have a Codepen account. Because before you embed a project into somewhere else, you must save your work in Codepen. 
Opening an account is easy and free. As you are reading this post, you may already have a Codepen account. 

2. Open the project in Codepen.io. (Again, if its your own project, you must save the project first.) You will see something like this:


codepen-project-snapshot


At the lower right corner, there are three buttons: Share, Export and Embed. (Click on the image above for a larger view.) 

3. Click on the Embed button in your Codepen.io project page. A new pop-up titled "Embed This Pen" will open. Now, if you scroll down, you will see a "Copy and Paste Code" section. There are three ways to embed code. You will see three tabs. One for Wordpress, one called iFrame and another HTML.


codepen-embed-popup


But you don't see anything specific for Blogger, right? Actually both the codes in iframe and HTML tab will work for Blogger. However, I have had some problems with the HTML version of the code (even though it is marked as recommended). 

So, I would suggest that you click on the iframe tab and copy the code form there.

4. Next, open the blogger post withing which you want to add the Codepen project codes and go to edit mode. In the Blogger's edit mode, you will see there are two editing options: Compose and HTML.

compose-html-blogger

By default, we edit our blog posts in Compose mode. But now, click the HTML mode and paste the iframe code you copied from Codepen in step 3. 

5. Click back to Compose mode and you will see the Codepen project has been embaded in your Blogger post! Now, you can add blog texts above and below the Codepen iframe.

So, we are done. It's time to share your Codepen projects in Blogger! 

Note:
If you have a Codepen pro account, you can even make the embedded Codepen codes editable!


I hope you have found this post helpful. Let me know if something is not working and share your thoughts below.